Wavlink AC1200 Setup – Complete Guide to Get You Online in Minutes
Want to get better WiFi coverage without having to upgrade your network?
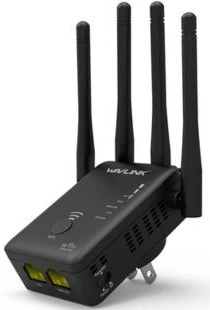
The Wavlink AC1200 makes your wireless signal stronger and helps you get rid of dead spots in your home or office. This page has all the steps you need to do to set up your Wavlink AC1200. If you’re using a device for the first time or changing its settings, every step is simple so you can connect without facing any technical problems or wasting your time.
Why is setting up the Wavlink AC1200 important?
The Wavlink AC1200 extends WiFi range and provides dual-band access. It is known for enhancing weak signals and filling dead areas in homes and small offices. But here’s the thing: no matter how amazing the hardware is, it won’t work well until it’s set up right. This tutorial is meant to help you avoid the mistakes that many people make when they install anything.
What You Need Before Beginning
Before setting up the Wavlink AC1200, make sure you have:
- A phone, tablet, or computer
- The name and password for your WiFi network
- A power outlet close by
- Patience (just in case)
A reliable internet connection
Wavlink AC1200 Setup: Range Extender Mode (Commonly used mode)
This setup is preferred by most of the people, especially if you want better WiFi coverage in different rooms.
Step 1: Plug and power it
Install the extender in a wall outlet with strong WiFi. Wait until the LEDs remain blue or green and stop flickering.
Step 2: Link to the Extender
To connect to the new wireless network name that is somewhat similar to “Wavlink-XXXX”, go to the WiFi settings on your phone or computer.
Step 3: Visit Setup Portal
Once your device is successfully connected and enter any of these: “192.168.10.1” or “ap.setup” into the browser. This brings up the configuration dashboard for the Wavlink AC1200.
Step 4: Select “Repeater” Mode
The setup screen will provide you a few options. Choose Repeater to make your current WiFi network stronger.
Step 5: Choose the network at home
It will look for WiFi networks that are close by. Choose your home network from the list, and then type in your WiFi password when asked.
Step 6: Make a longer name for the network
You may maintain the same name for your network or tweak it a little to make it easier to identify them apart (like “HomeWiFi_EXT”). To complete, click Apply or Next.
Step 7: Get back on your new network
Return to WiFi settings and connect to your new network when it resumes.
Setup Wavlink AC1200 as Access Point
Do you want to utilize your AC1200 as an access point? The steps are given below:
Step 1: Connect your device via ethernet
Plug in the extender into a power outlet and connect it to the router or modem via ethernet cable.
Step 2: Configuring the Network
Now, connect your device (phone or PC) to the extender via ethernet cable and navigate to 192.168.10.1 or ap.setup.
Step 3: Pick “Access Point”
Choose Access Point mode on the setup screen. This option creates a new WiFi network using the internet connection you already have.
Step 4: Give your network a name
Change the password and SSID (network name). Make it distinct from your main network so that devices can tell the difference.
Step 5: Setup is Done
After everything is done, now click “Apply,” then wait for the settings to be saved automatically. This will create a separate WiFi network now.
How to Change the Admin Password and the WiFi Password?
Changing the password for your WiFi or the login information for the admin may make things safer. Here’s how to accomplish both:
Change WiFi password:
- Connect your device to the extender’s network and open the extender’s settings page. Do that by entering “192.168.10.1” or “ap.setup” into any of the suitable browsers.
- After you reach the dashboard, fill in the default login information, i-e “admin” for both username & password.
- In your device, go to Wireless Settings and locate the SSID and Password boxes.
- Change your WiFi password and save.
- Reconnect devices with new password.
Change the password for the admin:
- On the main dashboard, click on the System Tools or Management link.
- Find the option for a password.
- Type in your old password, then type in your new password twice.
- After you have saved the new admin password, log in once again.
Common Wavlink AC1200 Setup Issues and Solutions
Can’t Get to the Setup Page?
- To do this, you can use any of the two: 192.168.10.1 and ap.setup.
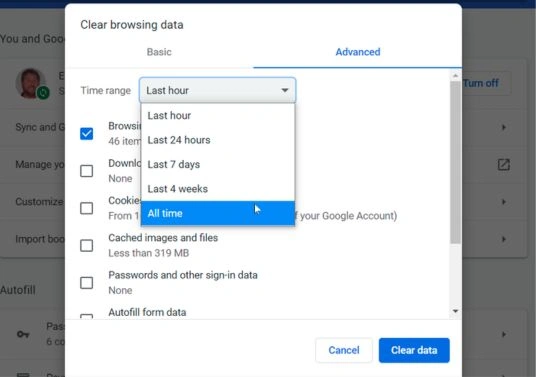
- If your website isn’t loading, try clearing your browser’s cache.
2. Error: Wrong Password?
- Make sure you have the right password for your router.
- Don’t copy and paste from your phone (invisible gaps might make things go wrong).
3. Signal Not Strong Enough?
- Place the extender halfway between the region with a poor signal and your router. Do not put it in a dead zone.
How to reset the Wavlink AC1200?
A reset may rescue the day if things go wrong or the setup stops working in the middle.
How to Restart:
- Use a pin to press and hold the Reset button (which is normally in a tiny hole) for approximately ten seconds.
- Wait for the lights to flash and go back to their normal setting.
- Start the Wavlink AC1200 setup procedure again.
How to Setup Wavlink AC1200 and What Not to
Do:
- Set up using Chrome or Firefox.
- Ensure the extender is in an airy location.
- Restart the extender often for optimal performance.
Don’t:
- Put the extension behind sturdy walls or appliances.
- Use old firmware (you may check for upgrades on the Wavlink page).
- Ignore flashing lights since they may indicate a problem.
Can a mobile app set up Wavlink AC1200?
Some Wavlink AC1200s may be set up via app. If yours does, the user manual or the box will include instructions. But the best way to proceed is still to set up your browser, which gives you full control.
How to tell whether the Wavlink AC1200 Setup was successful?
You can tell it’s functioning if you see this:
- The LED on the extension stays solid (green or blue, depending on the model).
- Your device now displays your new network.
- Internet speeds improve in formerly sluggish areas.
Still unsure? Before and after setting up, do a speed test to see how the results differ.
FAQs
Last Thoughts: Setting Up Doesn’t Have to Be Hard
The Wavlink AC1200 can be set up by non-techies. You should have a better, more dependable signal to access the web if you’ve done everything right. And if not? Deep breath, reset, and try again.
Each model is different, but with patience and guidance, you may maximize the signals of your extender. The Wavlink AC1200 is a great step forward, whether you’re setting up a home office or simply sick of sluggish loading screens on your sofa. simply make sure you set it up correctly.